🛡️Universal rules: before any boss, check ammo + food + bag space + team position. Do not throw bait or open crates during the fight. Once the boss is below 30% HP, do not chase it — pull back.
Universal rules
Every boss in this game has the same three rules:
- Bring a full stack of healing food. Volcano lava can pre-cook fish for 1.5x and act as your healing stockpile.
- One fully-upgraded weapon beats four half-upgraded ones. The achievement "Fully Armed" wants a single weapon with all attachments, and that is also the meta.
- Phase swaps happen at half HP. Stance that worked in phase 1 is wrong in phase 2 — re-orient immediately.
1. Spider Crab (Lighthouse)
Phases: single phase.
- Weapon: knife or pistol. Soloable.
- Mechanic: the crab periodically stuns itself. Stun windows are your highest DPS.
- Stance: circle a tree or a hut; the crab charges in a straight line and turns slowly — keep the obstacle between you.
- Healing: drop 3–4 small fish on the sand before the fight; pick them up when low HP.
- Trophy: the crab shell (not the meat) — hand it to Melvin for the boat keys.
2. Giant Piranha (Forest)
Phases: single phase + adds.
- Weapon: shotgun (priority) with laser sight + damage upgrade. Pistol as fallback.
- Prerequisite: collect 3 leeches from Forest grass → hand them to the lady by the lake → she gives the Modified Leech lure → cast → Piranha surfaces.
- Mechanic: small piranha adds spawn around the boss. Clear adds first, then focus fire.
- Stance: fight near the lake lady's hut, not under trees — the tree roots snag movement.
- Trophy: the fish skeleton (not the meat). Hand to the lady for the Desert coordinates.
3. Blue Shark (Desert)
Phases: single phase, fights in shallow water.
- Weapon: SMG (Uzi) works; shotgun still reliable.
- Prerequisite: Standard Boss Lure directly summons it.
- Mechanic: the Blue Shark drags you into the water. Underwater vision is bad and you take constant chip damage. Stay on the sand.
- Stance: strafe along the shoreline; keep the boss facing open water so its charges whiff.
- Trophy: the whole shark goes to the Grillmaster in exchange for grill access.
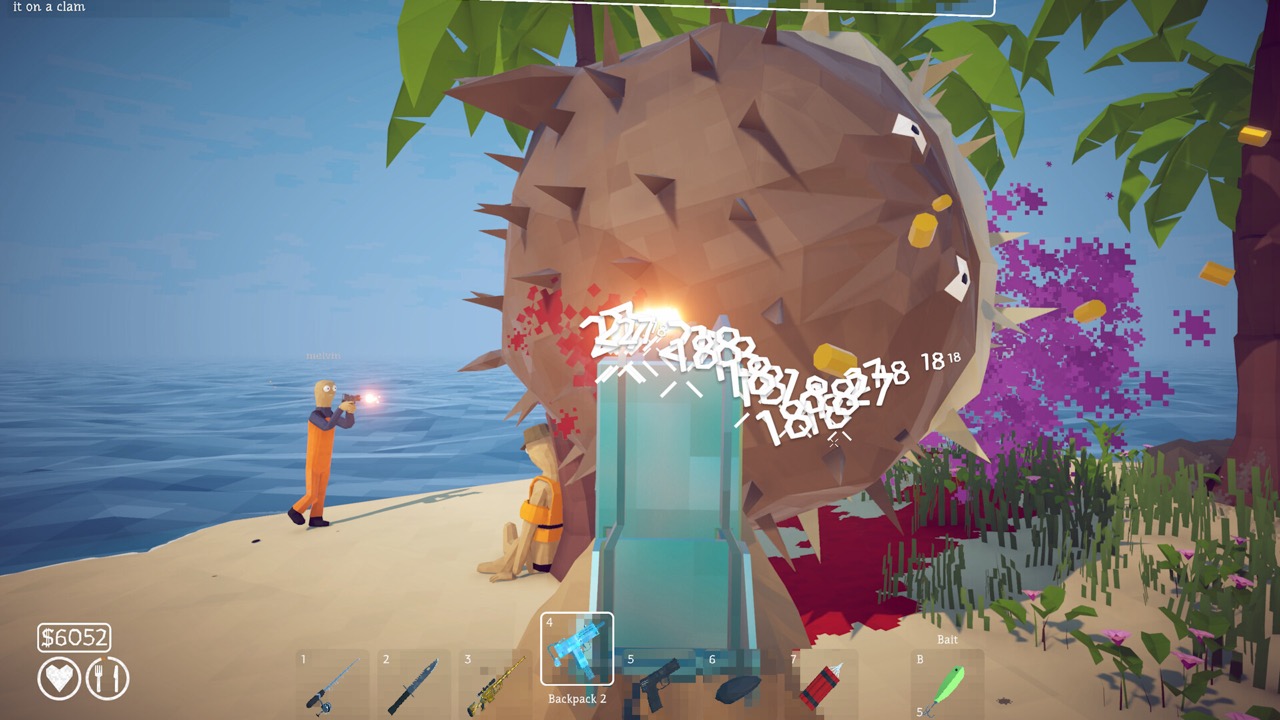
4. Pufferfish (Desert · mainline)
Phases: two phases (swap at 50% HP).
- Weapon: SMG / Uzi with compensator + red dot / laser. Shotgun works in phase 1 but loses pace in phase 2.
- Prerequisite: trade an endangered fish (Needlefish / Seahorse / Bowlfish) to the Traveler NPC → receive a Carrot bait → cast → Pufferfish surfaces.
- Phase 1 mechanic: lower HP = bigger body. Bigger hitbox, but the body slam hits harder. Do not get greedy.
- Phase 2 mechanic: the Pufferfish trails a persistent purple poison cloud and applies poison on contact. Never chase through its recent path.
- Stance (phase 1): keep a palm tree or shop building between you and the boss. Circle the same tree; the Pufferfish charges in a straight line and turns slowly, so it slams into the tree repeatedly while you chip in.
- Stance (phase 2): break the tree-loop. Run a wide outer circle to let the cloud dissipate, then re-engage from a different angle.
- Dynamite option: fight from the dynamite shop doorway — you can throw bombs without closing the distance. In co-op, place 20 bombs before the fight and detonate on the spawn for an instant kill. Solo, dynamite is more expensive than it is worth.
- Trophy: the Pufferfish fin to the Traveler for the Rocks coordinates. The Pufferfish body itself sells for ~$12,000.
⚠️The Pufferfish is the most common solo wipe. The poison cloud will corner you if you do not break the tree-loop in phase 2. Distance + wide circles + never walk the same path twice.
5. Tuna (Rocks · prerequisite)
Phases: single phase, heavy hitter.
- Weapon: Professional Lure + upgraded Fishing Rod. Shotgun or high-RoF pistol preferred.
- Mechanic: the Tuna has a thick HP bar and a fast attack cadence. Do not hug.
- Stance: backpedal. When it lunges, sidestep and let it whiff.
- Trophy: keep the Tuna — it is the bait for the Albatross. Do not sell it.
6. Albatross (Rocks · mainline)
Phases: two phases: dive + aerial bomb.
- Weapon: every teammate runs a sniper rifle with armor-piercing and damage upgrades.
- Prerequisite: buy Professional Lure ($1,200/pack) → catch a Tuna → drop the Tuna on the ground as bait → the Albatross dives on it → fight starts.
- Stance: teammates split into different buildings. When you hear the bomb-spawn audio, run inside; come out after the explosion. Never stand in the open.
- Phase 2: the Albatross drops bombs from the sky. Read the shadow on the ground to predict the impact point. Sidestep, do not sprint.
- Trophy: the bird head to the NPC for the Volcano coordinates.
7. Bowhead Whale (Volcano)
Phases: single phase, big body, periodic jump.
- Weapon: Assault Rifle with a silencer; if damage feels low, keep upgrading the ammo.
- Prerequisite: trade 5 random catches to the Scientist for a Fish Bucket → cast → Bowhead Whale surfaces.
- Mechanic: the whale periodically leaps. The landing and the low-altitude glide are the safest DPS windows.
- Stance: use the open ground next to the Volcano shop. Keep moving; do not stand and spray. Watch the leap direction, hip-fire while strafing.
- Lava: lava deals direct damage and leaves a burn patch for a few seconds after you walk off. Read your feet; missing a few shots is better than stepping in.
- Pre-fight prep: lava also pre-cooks fish at 1.5x with no burn risk. Cook 5–6 fish in the lava as healing food before the fight.
- Trophy: the whale corpse — do not hand in; throw it into the volcano mouth to trigger the Mutated Bowhead Whale.
8. Mutated Bowhead Whale (Volcano · final)
Phases: two phases — base Bowhead behavior + a new area-of-effect attack in phase 2.
- Weapon: everyone runs an upgraded Assault Rifle. Bring extra dynamite-fish on the ground for emergencies.
- Prerequisite: kill the Bowhead Whale, then throw its corpse into the volcano.
- Mechanic: larger body, longer leap distance. The new AOE in phase 2 is a shockwave or a lava ring around the whale.
- Stance: the same as Bowhead, but break the loop hard on AOE — do not try to sneak damage during the AOE.
- Trophy: the Mutated Bowhead Whale fin to the NPC — the home cinematic plays.
General tips
- Max out one weapon before buying a second: the Fully Armed achievement wants every attachment on a single gun; the Uzi is the cheapest path to it (~$2,500 fully upgraded).
- Don't buy the top engine early: the I Am Speed / Tsunami achievement requires the top engine, which is sold only on the Rocks island. If you skip it, there is no way to unlock the achievement later.
- Use the slot machine sparingly: gold skins are fun, but they are best earned with low-value fish. Drip variants are 3–10x more valuable if sold directly.
- Controller vs keyboard: the game supports controllers, but most boss kites are smoother on keyboard.
Every boss in the game has a 50% HP phase swap. Higher DPS means a shorter, safer phase 2. Upgrade and learn to twitch-cast before any boss fight.How to Fish Guide Hub
Next
Now that you can win the fights, run the economy tighter with Money & gear.